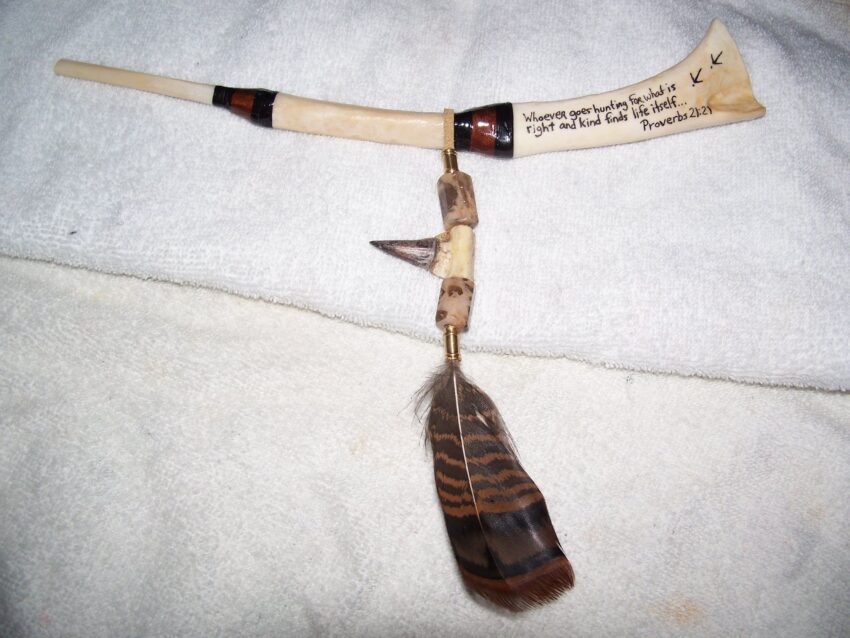
This tutorial will show you how to make a wingbone turkey call. This call is simple to construct but difficult to master. Calling in a bird with a call you crafted out of another fowl, on the other hand, is a tremendously fulfilling experience. Please keep in mind that the images are not mine, and I claim no credit for them.
What You’ll Need
First and foremost, you must shoot a wild turkey before making the wingbone call. With your tagged bird in hand, gather some old newspapers (assuming some of you still read them in print), paper towels (these also work fine), a plastic bag, a dependable knife, a hacksaw or similar cutting tool, a tapered file, sandpaper, pipe cleaners, even wire, and a glue gun or similar epoxy distributor. A Dremel tool is used by several of my wingbone callmakers. It’s a lot less difficult.
Materials:
- a turkey (one that you legally shot or found)
- glue
- water
Tools:
- saucepan
- stove
- knife
- pipecleaner
- hacksaw
How to Build a Wingbone Turkey Call
Follow these steps to create a wingbone call:
Step 1
Cover the surface with newspaper or paper towels while you work. Keep some paper towels on hand as well. Place the turkey on a piece of newspaper. Determine the location of the wild turkey’s wing joint and body. Remove the wing from the body of the turkey by twisting and cutting it free from the socket joint, being cautious not to damage the wing’s bones. You can obviously create two wingbone calls as well. If this is the case, just remove both wings.
Step 2
Now, with the radius, ulna, and bigger humerus bone still connected, remove the bony wing tip. With a knife, gently scrape away feathers and flesh from the bones. Put everything in the plastic trash bag. The radius and ulna wingbones, which run parallel in the central region of the wing, are still linked to the bigger humerus bone at this time. In terms of structure, hen bones, gobbler bones, and wingbones from both sexes can be used to generate structural and acoustic variances. Finally, you must make a decision. Single- and two-bone calls can also be effective.
Step 3
To separate the three bones. The radius (the thinner of the two middle bones), ulna (the thicker of the two middle bones), and humerus (the biggest bone left) should be cooked in water for about 15 minutes. Keep an eye on things: the longer bones simmer, the more brittle they become.
Step 4
Using your knife, carefully scrape the remaining cartilage and flesh off the bones. Use a bandsaw, hacksaw, tapered file edge, or other similar instrument to cut off the two ends of each bone, just enough to reveal the insides. There is marrow in the bones that has to be removed. Remove the bony ends. Using a piece of wire or a pipe cleaner, scrape out the marrow inside each bone. Clean up the immediate inside end of each bone with your knife tip. Smooth the ends with sandpaper or a file.
Step 5
To brighten the bones, boil them a little longer or soak them in dishwashing detergent, hydrogen peroxide, or an equal mixture of water and bleach. Bleach can also make the bones brittle if kept in the solution for an extended period of time. After that, carefully dry the bones. Examine the bones carefully. The radius (again, the narrower middle bone) has a rounded end and a flattened end. Before gluing, fiddle with the parts to get a sense of how they’ll fit. If your significant other is wondering what you’re doing down in the basement, simply say, “Thinking.” But, seriously, this is part of the enjoyment.
Step 6
Insert the radius bone’s rounded end into the ulna (which once ran parallel to the radius). Allow glue to cure for several days in an airtight container. Some callmakers stop here since the radius and ulna bones can produce clucks and yelps on their own. Others include the humerus bone in the call to improve sound projection. Insert the other end of the ulna into the smaller point of the humerus (again, the largest wingbone) to link a third bone to your caller, which amplifies your calling. Glue these two pieces together with a snug fit in mind.
Step 7
Once dry, gently file away any rough edges, particularly at the mouthpiece end of the radius bone. If the adhesive seals have stayed airtight, your call is ready to use. Touch up with glue and sandpaper as required, or file. You’re all set to order a turkey.
Lastly, you can use the call, insert it in the corner of your mouth and clamp your lips tightly around it to create a seal. do not bite the call! then simply make a smacking sound. practice until you get the basic yelp down. then start stringing them together to make clucks and yelps. this teqnique can take a while to master, but if your looking for a call that turkeys don’t hear everyday, this is probably a great choice! also feel free to post any pictures of your personalized calls and turkeys that you took with them in the comments! don’t forget to rate!

